
Описание
This resource pack will turn your **Totem of Undying** into a different customized player skin by renaming it with an anvil.
***
# **Features:**
* This Resource pack works on **100% Vanilla**.
* You can put multiple customized skins in a pack, up to 100.
* Supports Wide and Slim Player Skin Types.
* It has different models for your player skin.
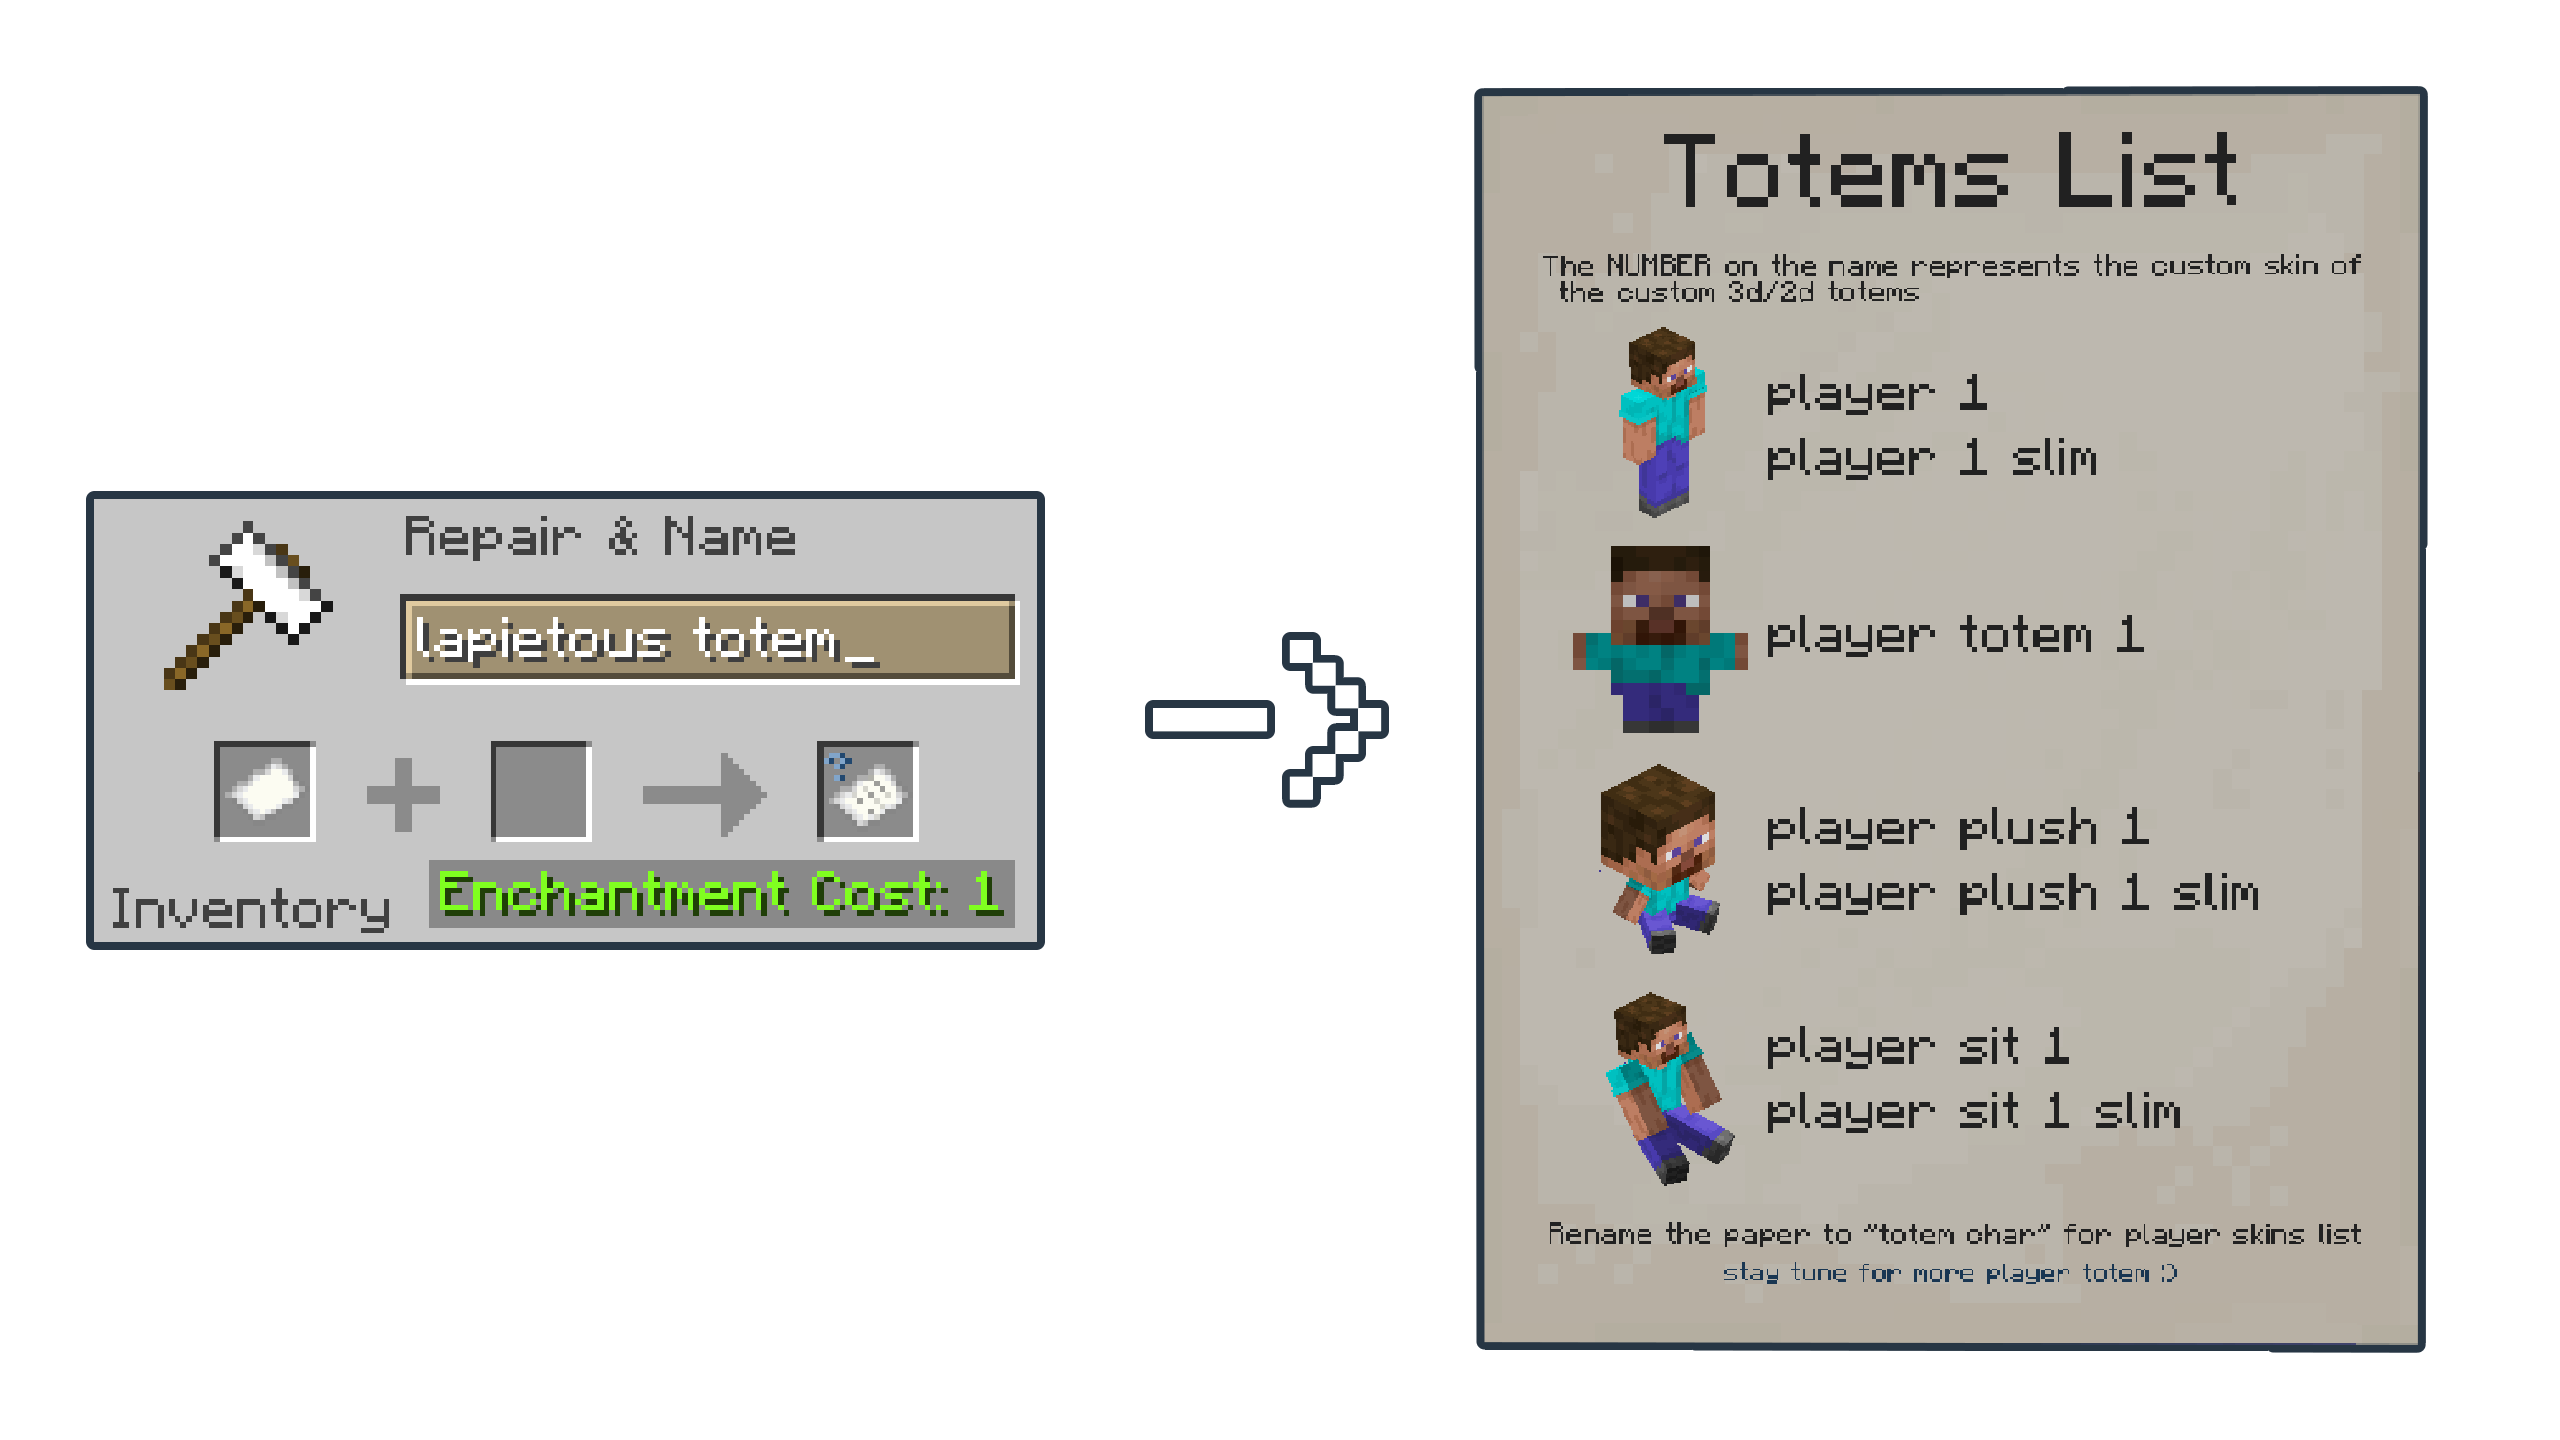
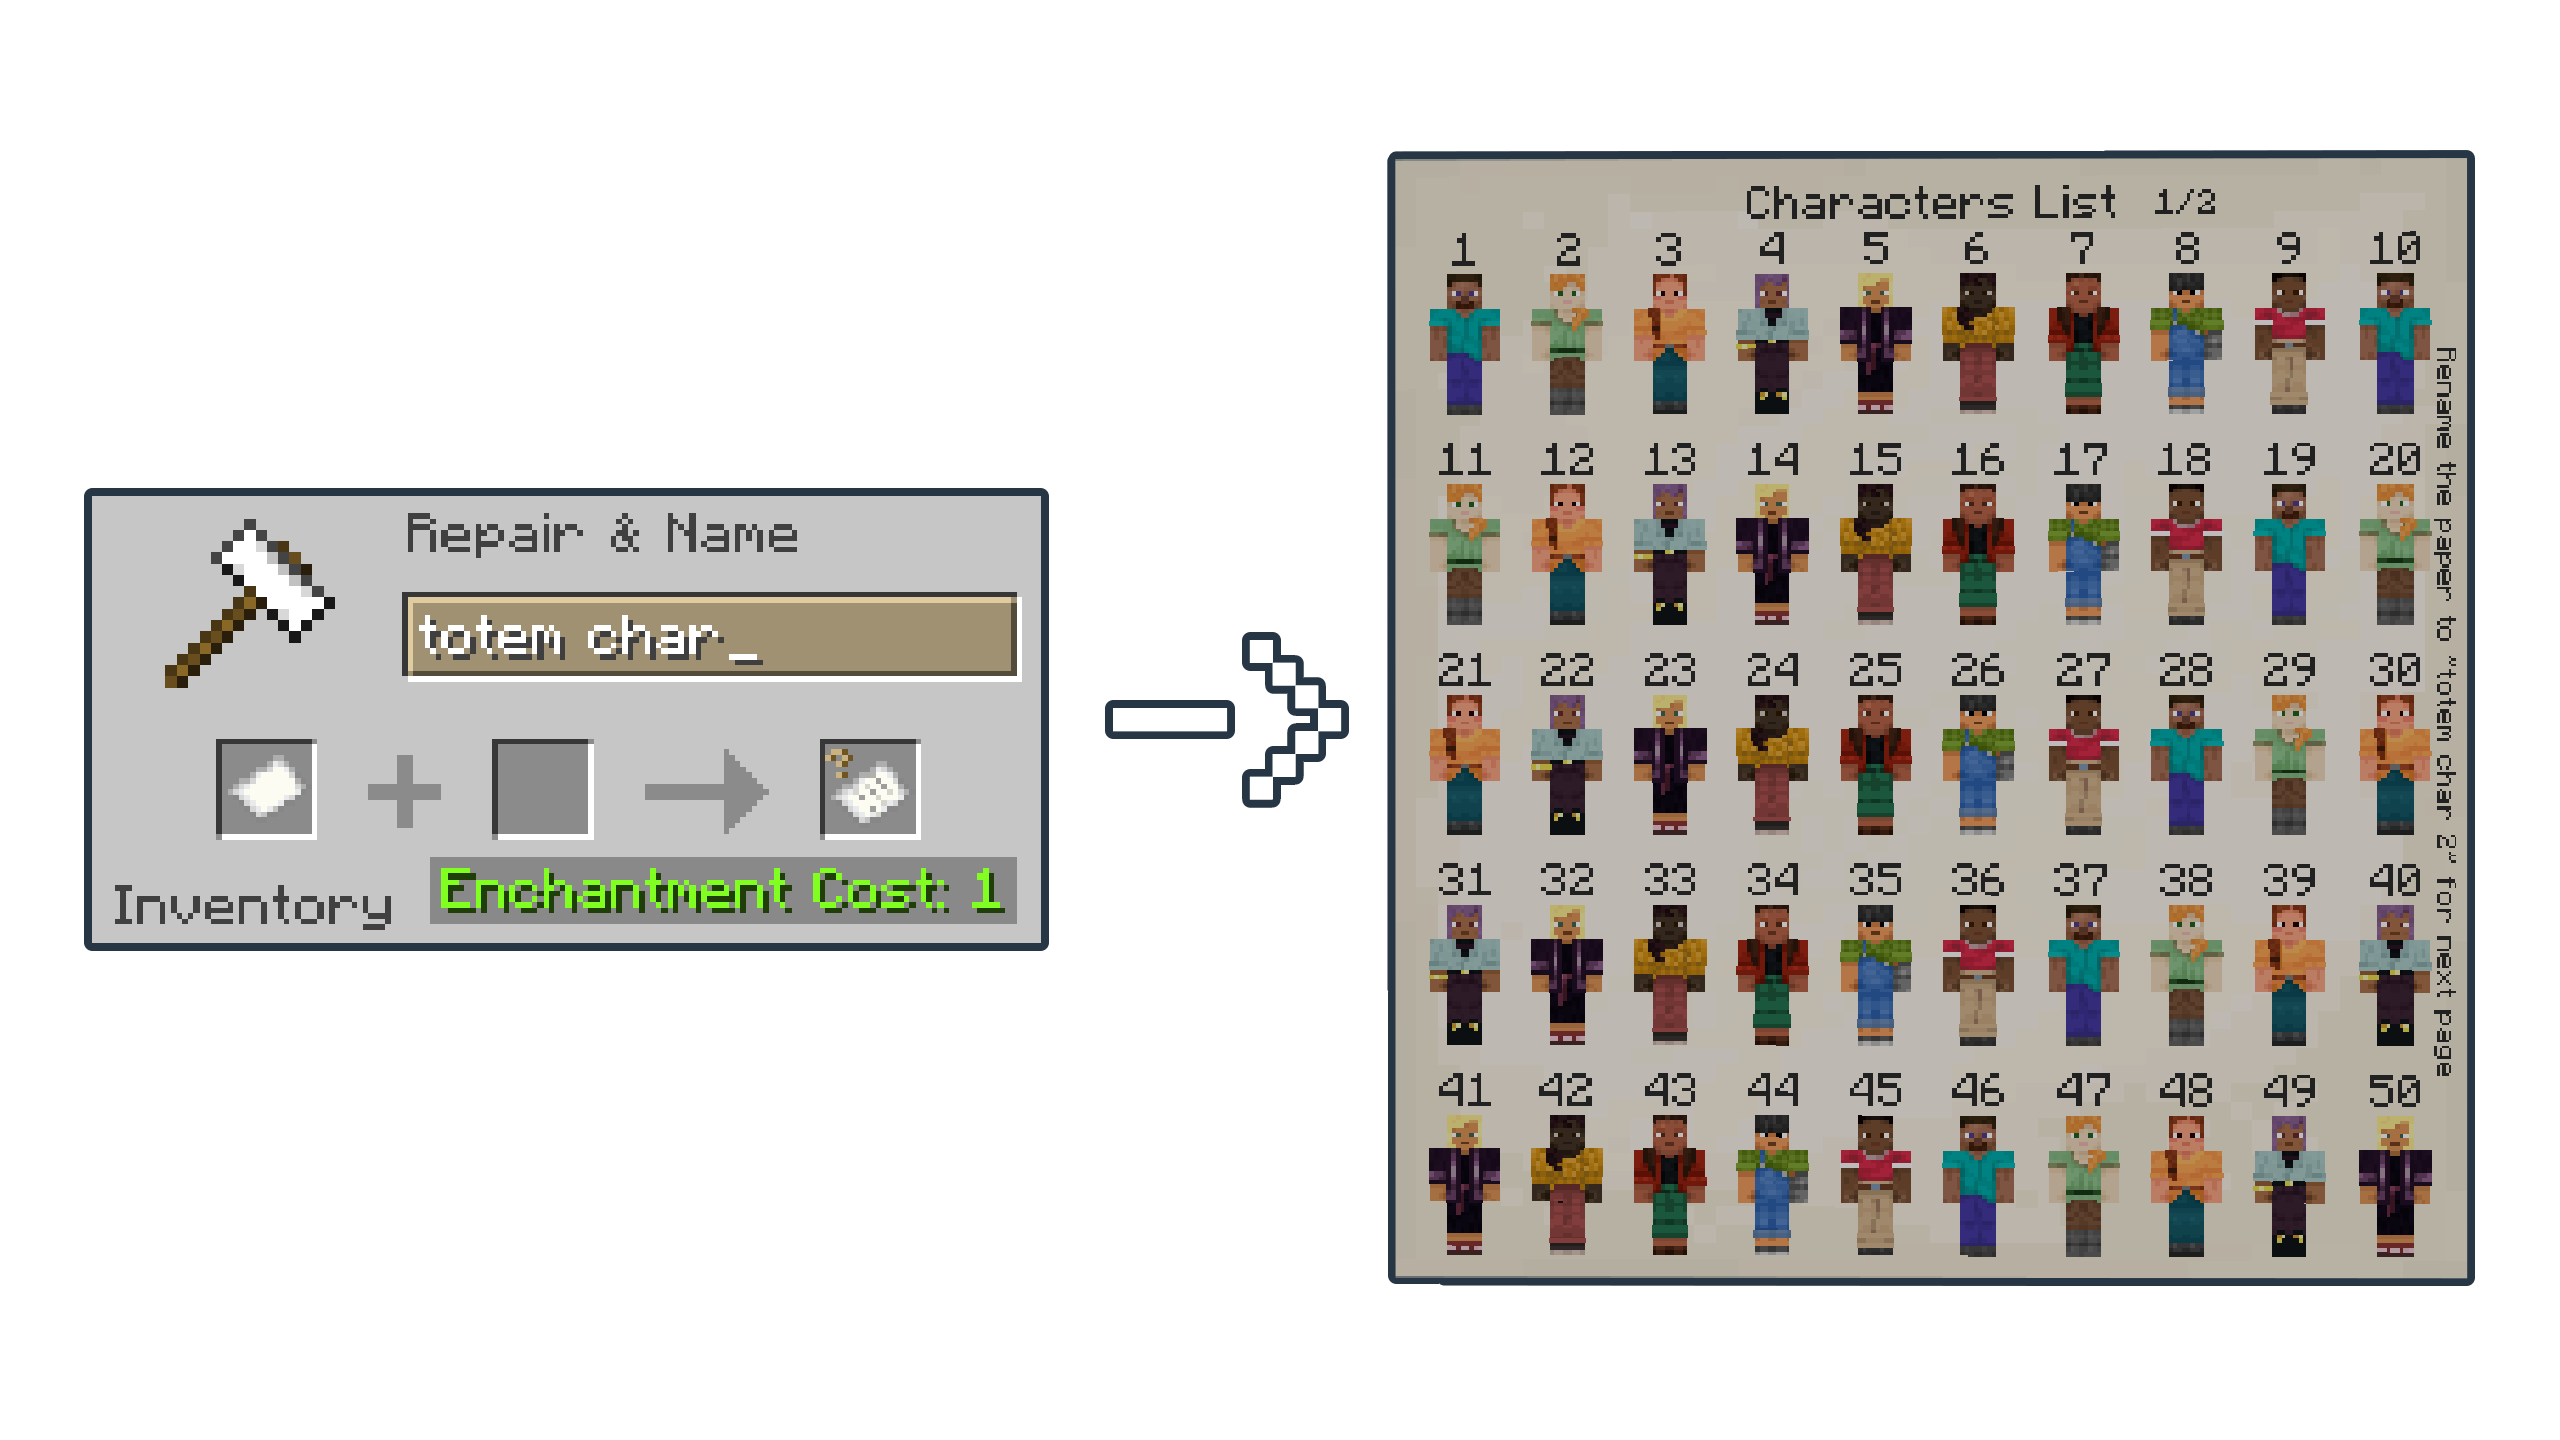
* It has a **Totem Name** and **Skin List** in-game by renaming a **PAPER** so you don't need to open the file to find your skin.
FEATURED Images
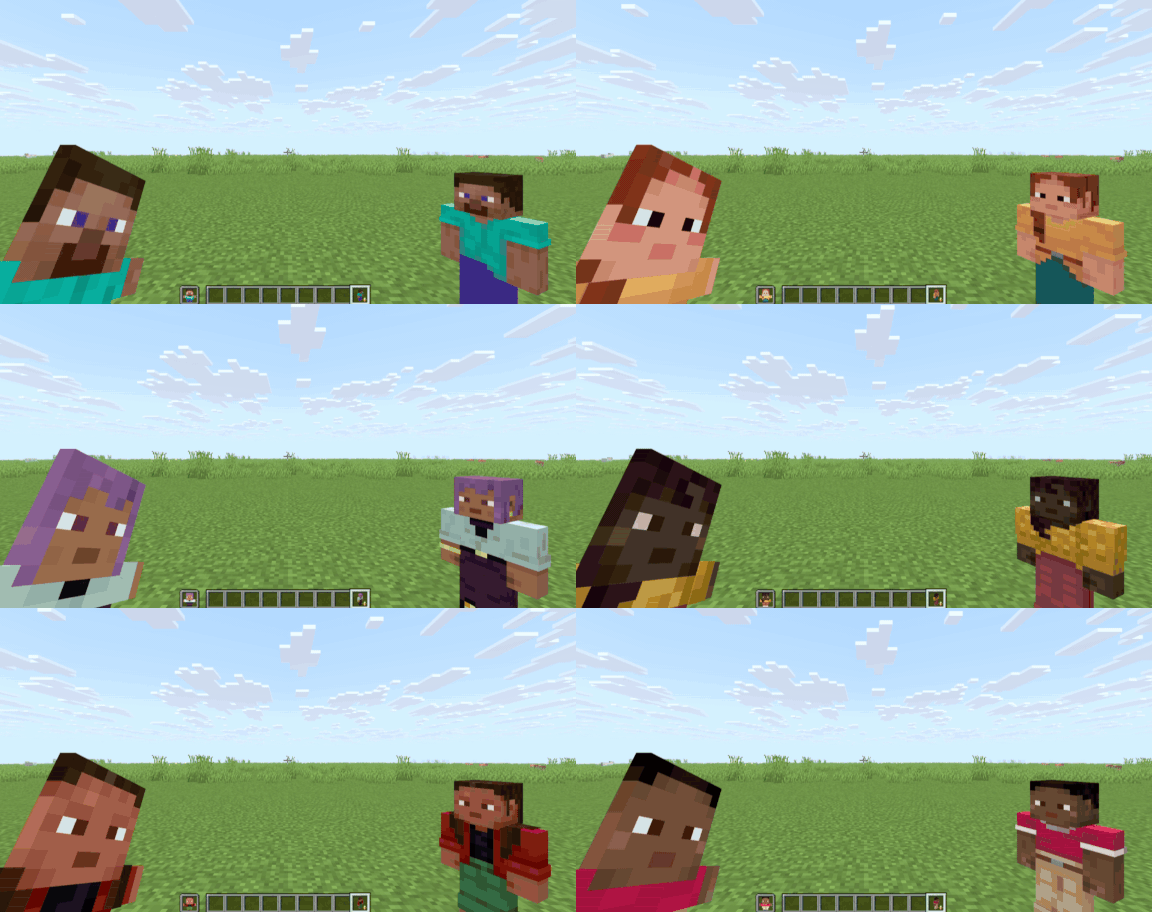
You can find more in the Gallery.
***
# **How to Use:**
* Use an Anvil to rename the **Totem of Undying** to Whatever Customized Player Totems you want.
* To rename, it depends on what model you want and what skin you apply; for example, you can rename the **Totem of Undying** to ``` player 1 ``` to change the totem into a Steve standing model or ``` player 2 ``` if you want the Alex skin _(the number on the name ``` 1 ``` and ``` 2 ``` represents the skin slot on the pack, which are Steve and Alex by default)_.
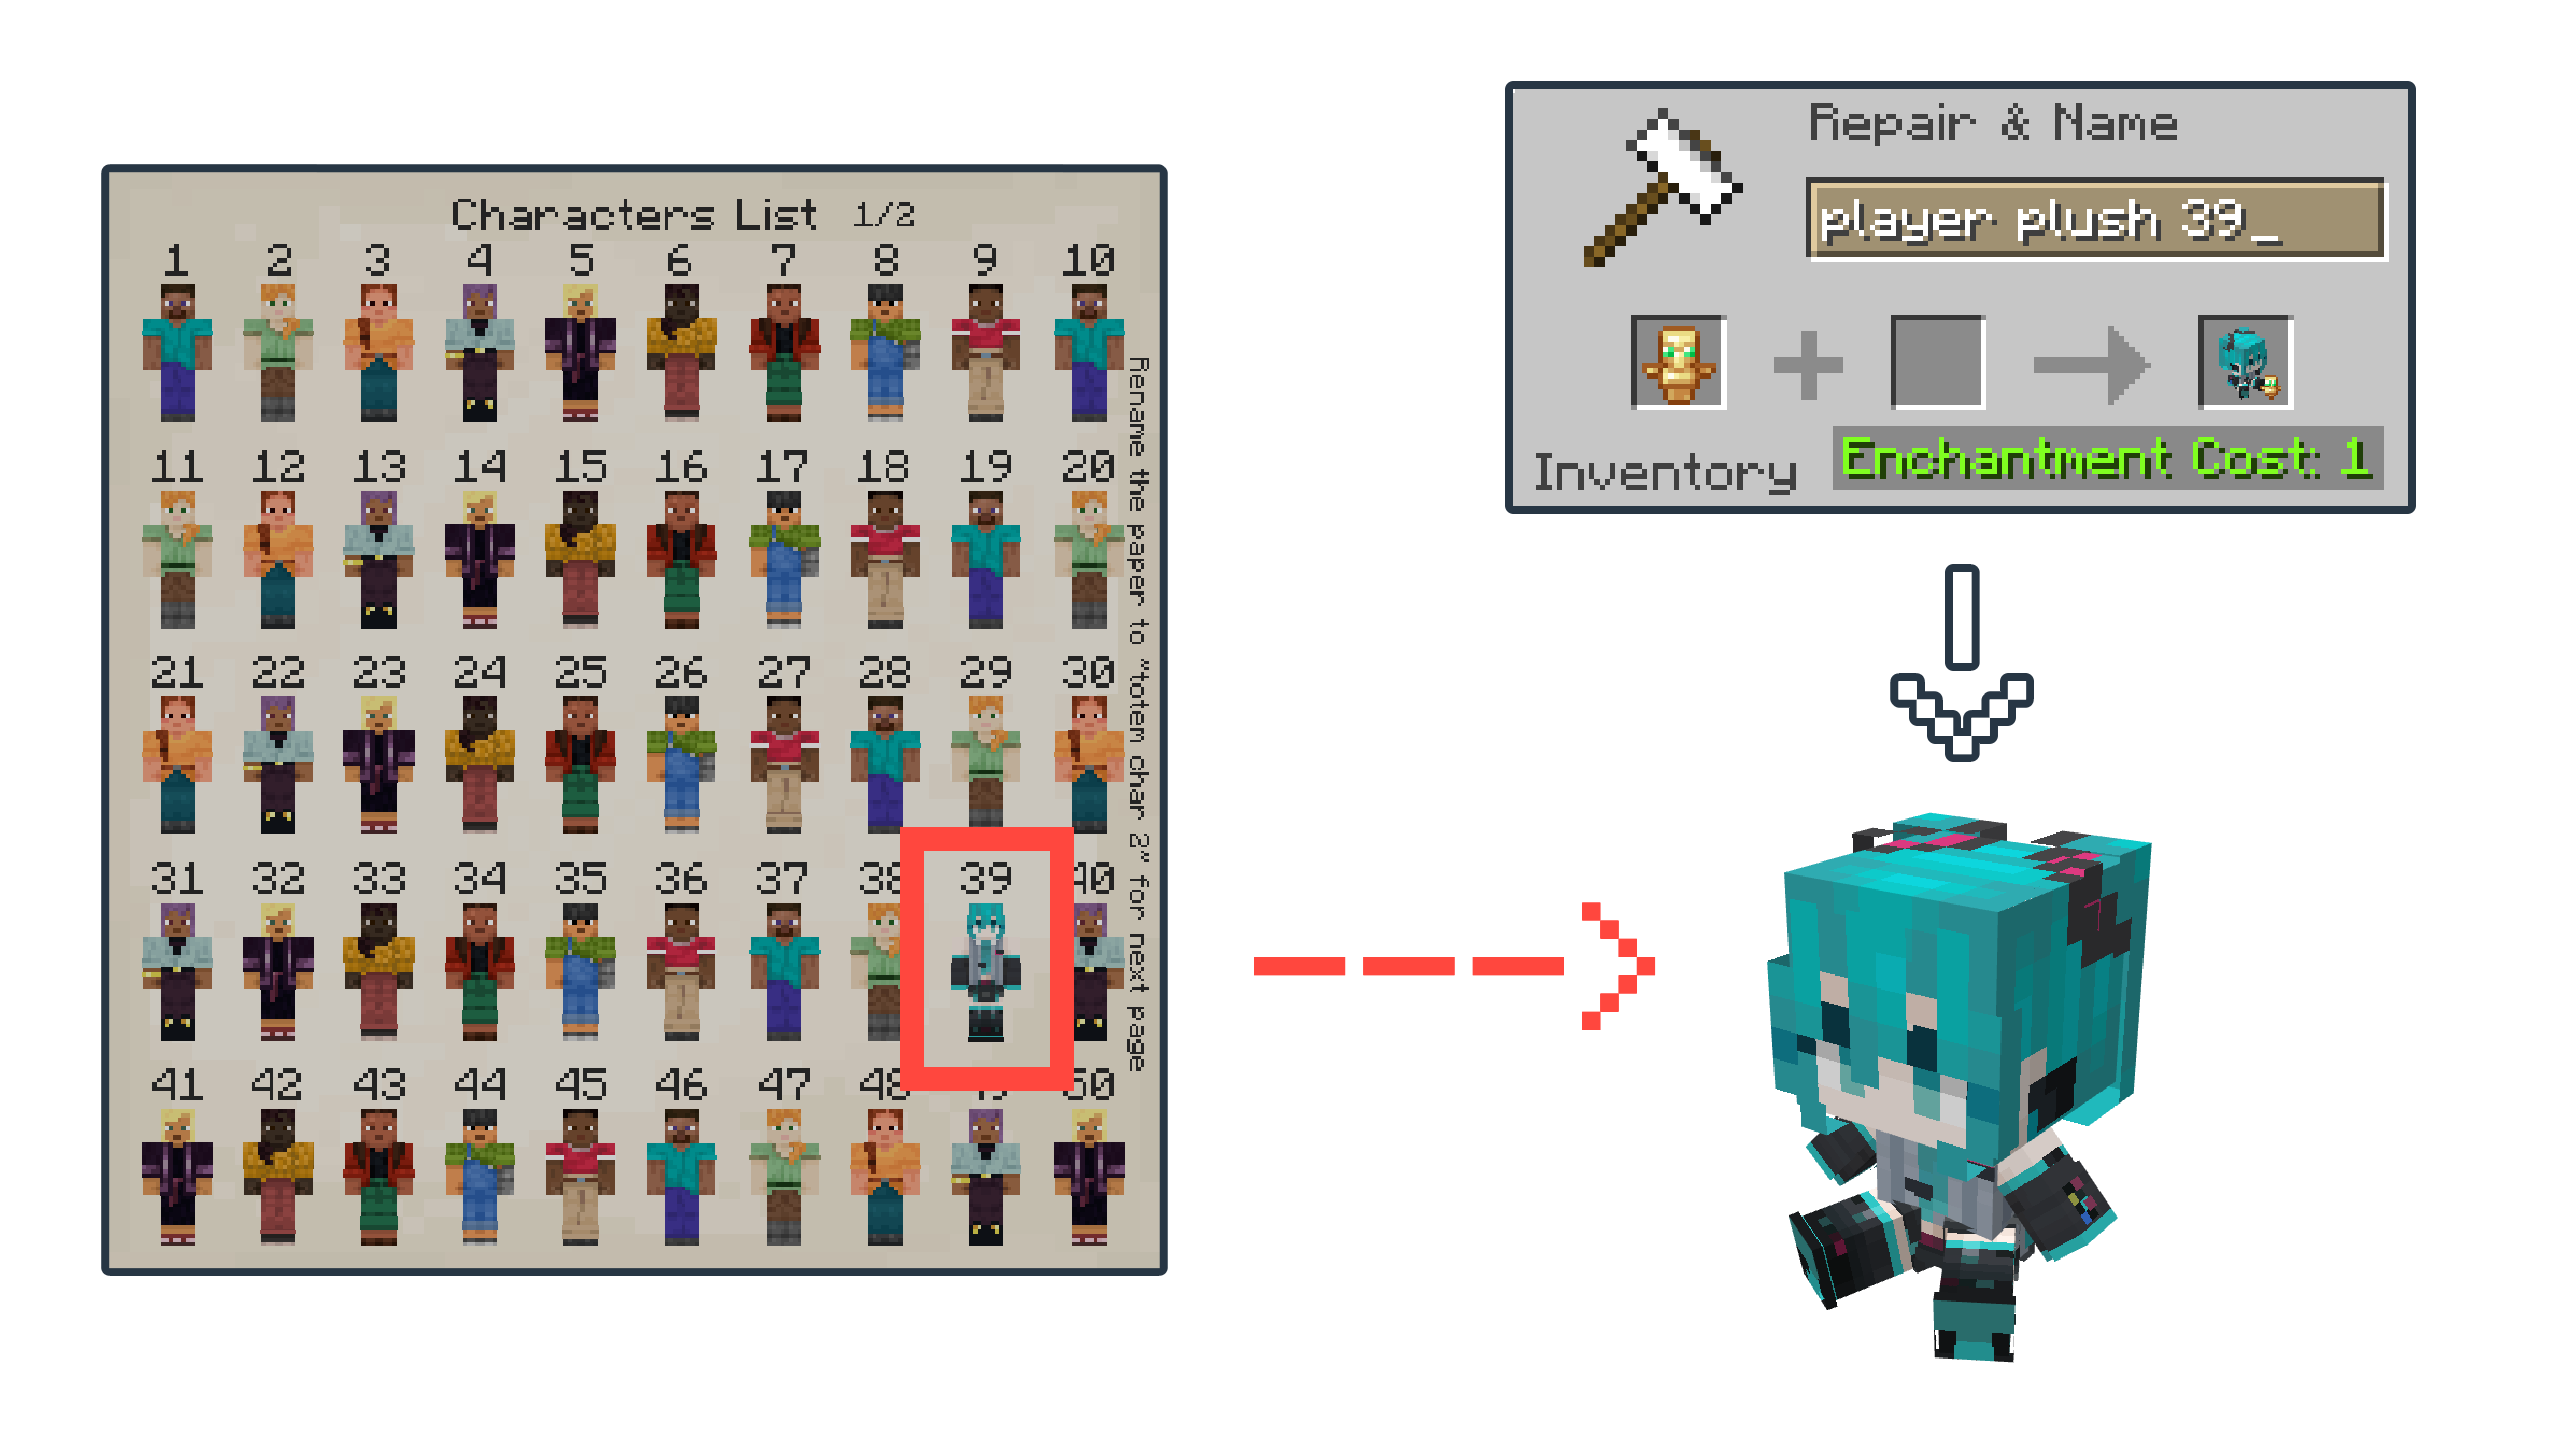
* You can change the model by renaming the **Totem of Undying** to ``` player plush 3 ``` to turn into an Ari plush model, ``` player totem 1 ``` for the Steve 2D totem model, and ``` player sit 8 ``` for the Sunny Sitting model _(the numbers ``` 3 ``` and ``` 8 ``` on the name are for Ari and Sunny skin by default)_.
* If the skin is built for a slim type model, you can add ``` slim ``` to the name, for example, ``` player 5 slim ```, ``` player sit 4 slim ```, and ``` player plush 7 slim ``` _(the number ``` 5 ```, ``` 4 ```, and ``` 7 ``` on the name are for Kai, Efe, and Noor skin by default)_.
| Totem Names | Sample Item | Has Slim Variant? |
| :--------: | :--------: | :--------: |
|``` player 1 ```||YES|
|``` player totem 1 ```||NO|
|``` player plush 1 ```||YES|
|``` player sit 1 ```||YES|
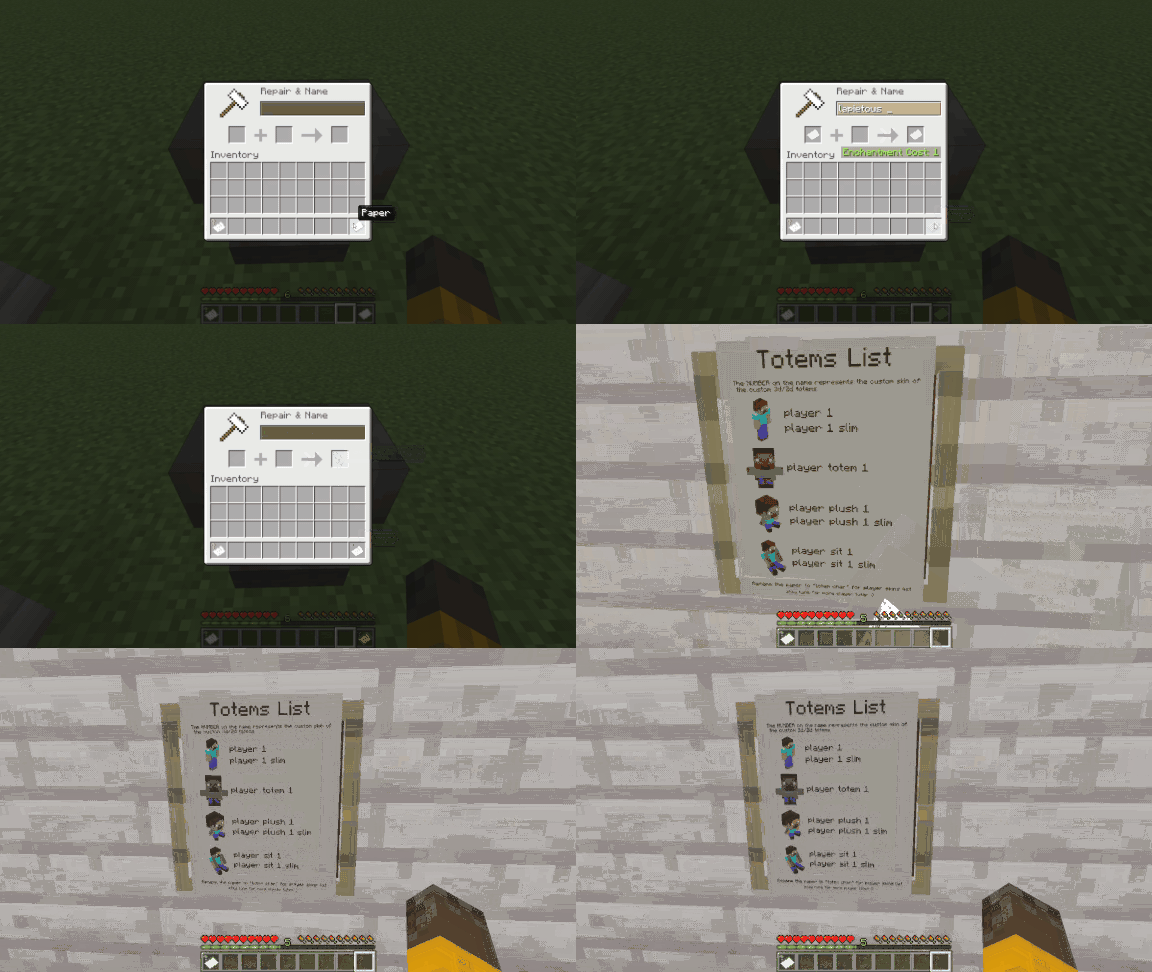
* If you forgot the Totem's names or if you want to see the Skin list, you can rename the **Paper** to ``` lapietous totem ``` for the Totem's name and ``` totem char ``` for the skins list _(the skin list has two pages, so add a number like this ``` totem char 2``` for the second page)_.
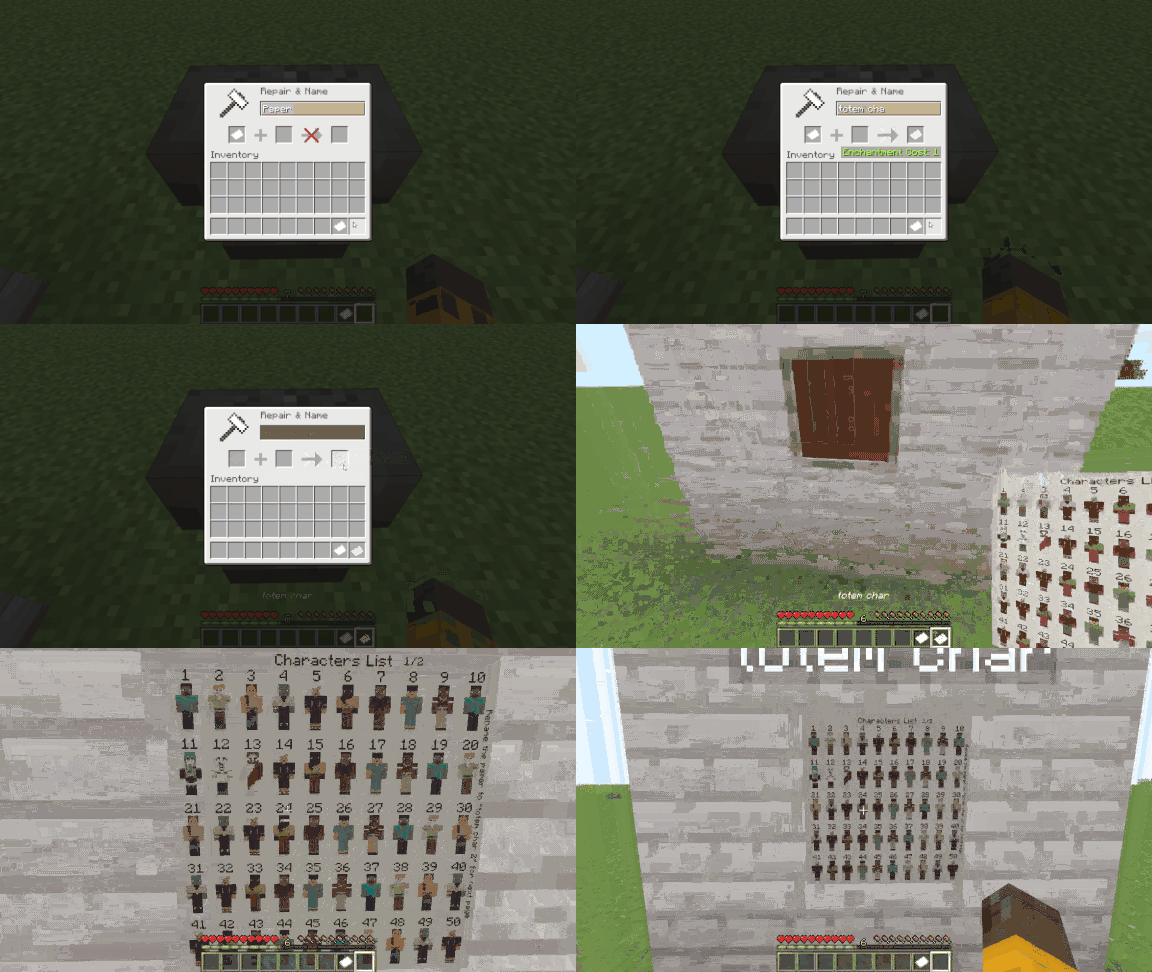
* You can customize the Skins By Replacing the default skin with your Skin by editing in the Resource Pack.
HOW TO APPLY YOUR CUSTOM SKIN
* Disable the resource pack.
* Rename your custom skin image file to the slot number you want
to replace, for Example: ``` 11.png ```, ``` 1.png ```, ``` 39.png ```.
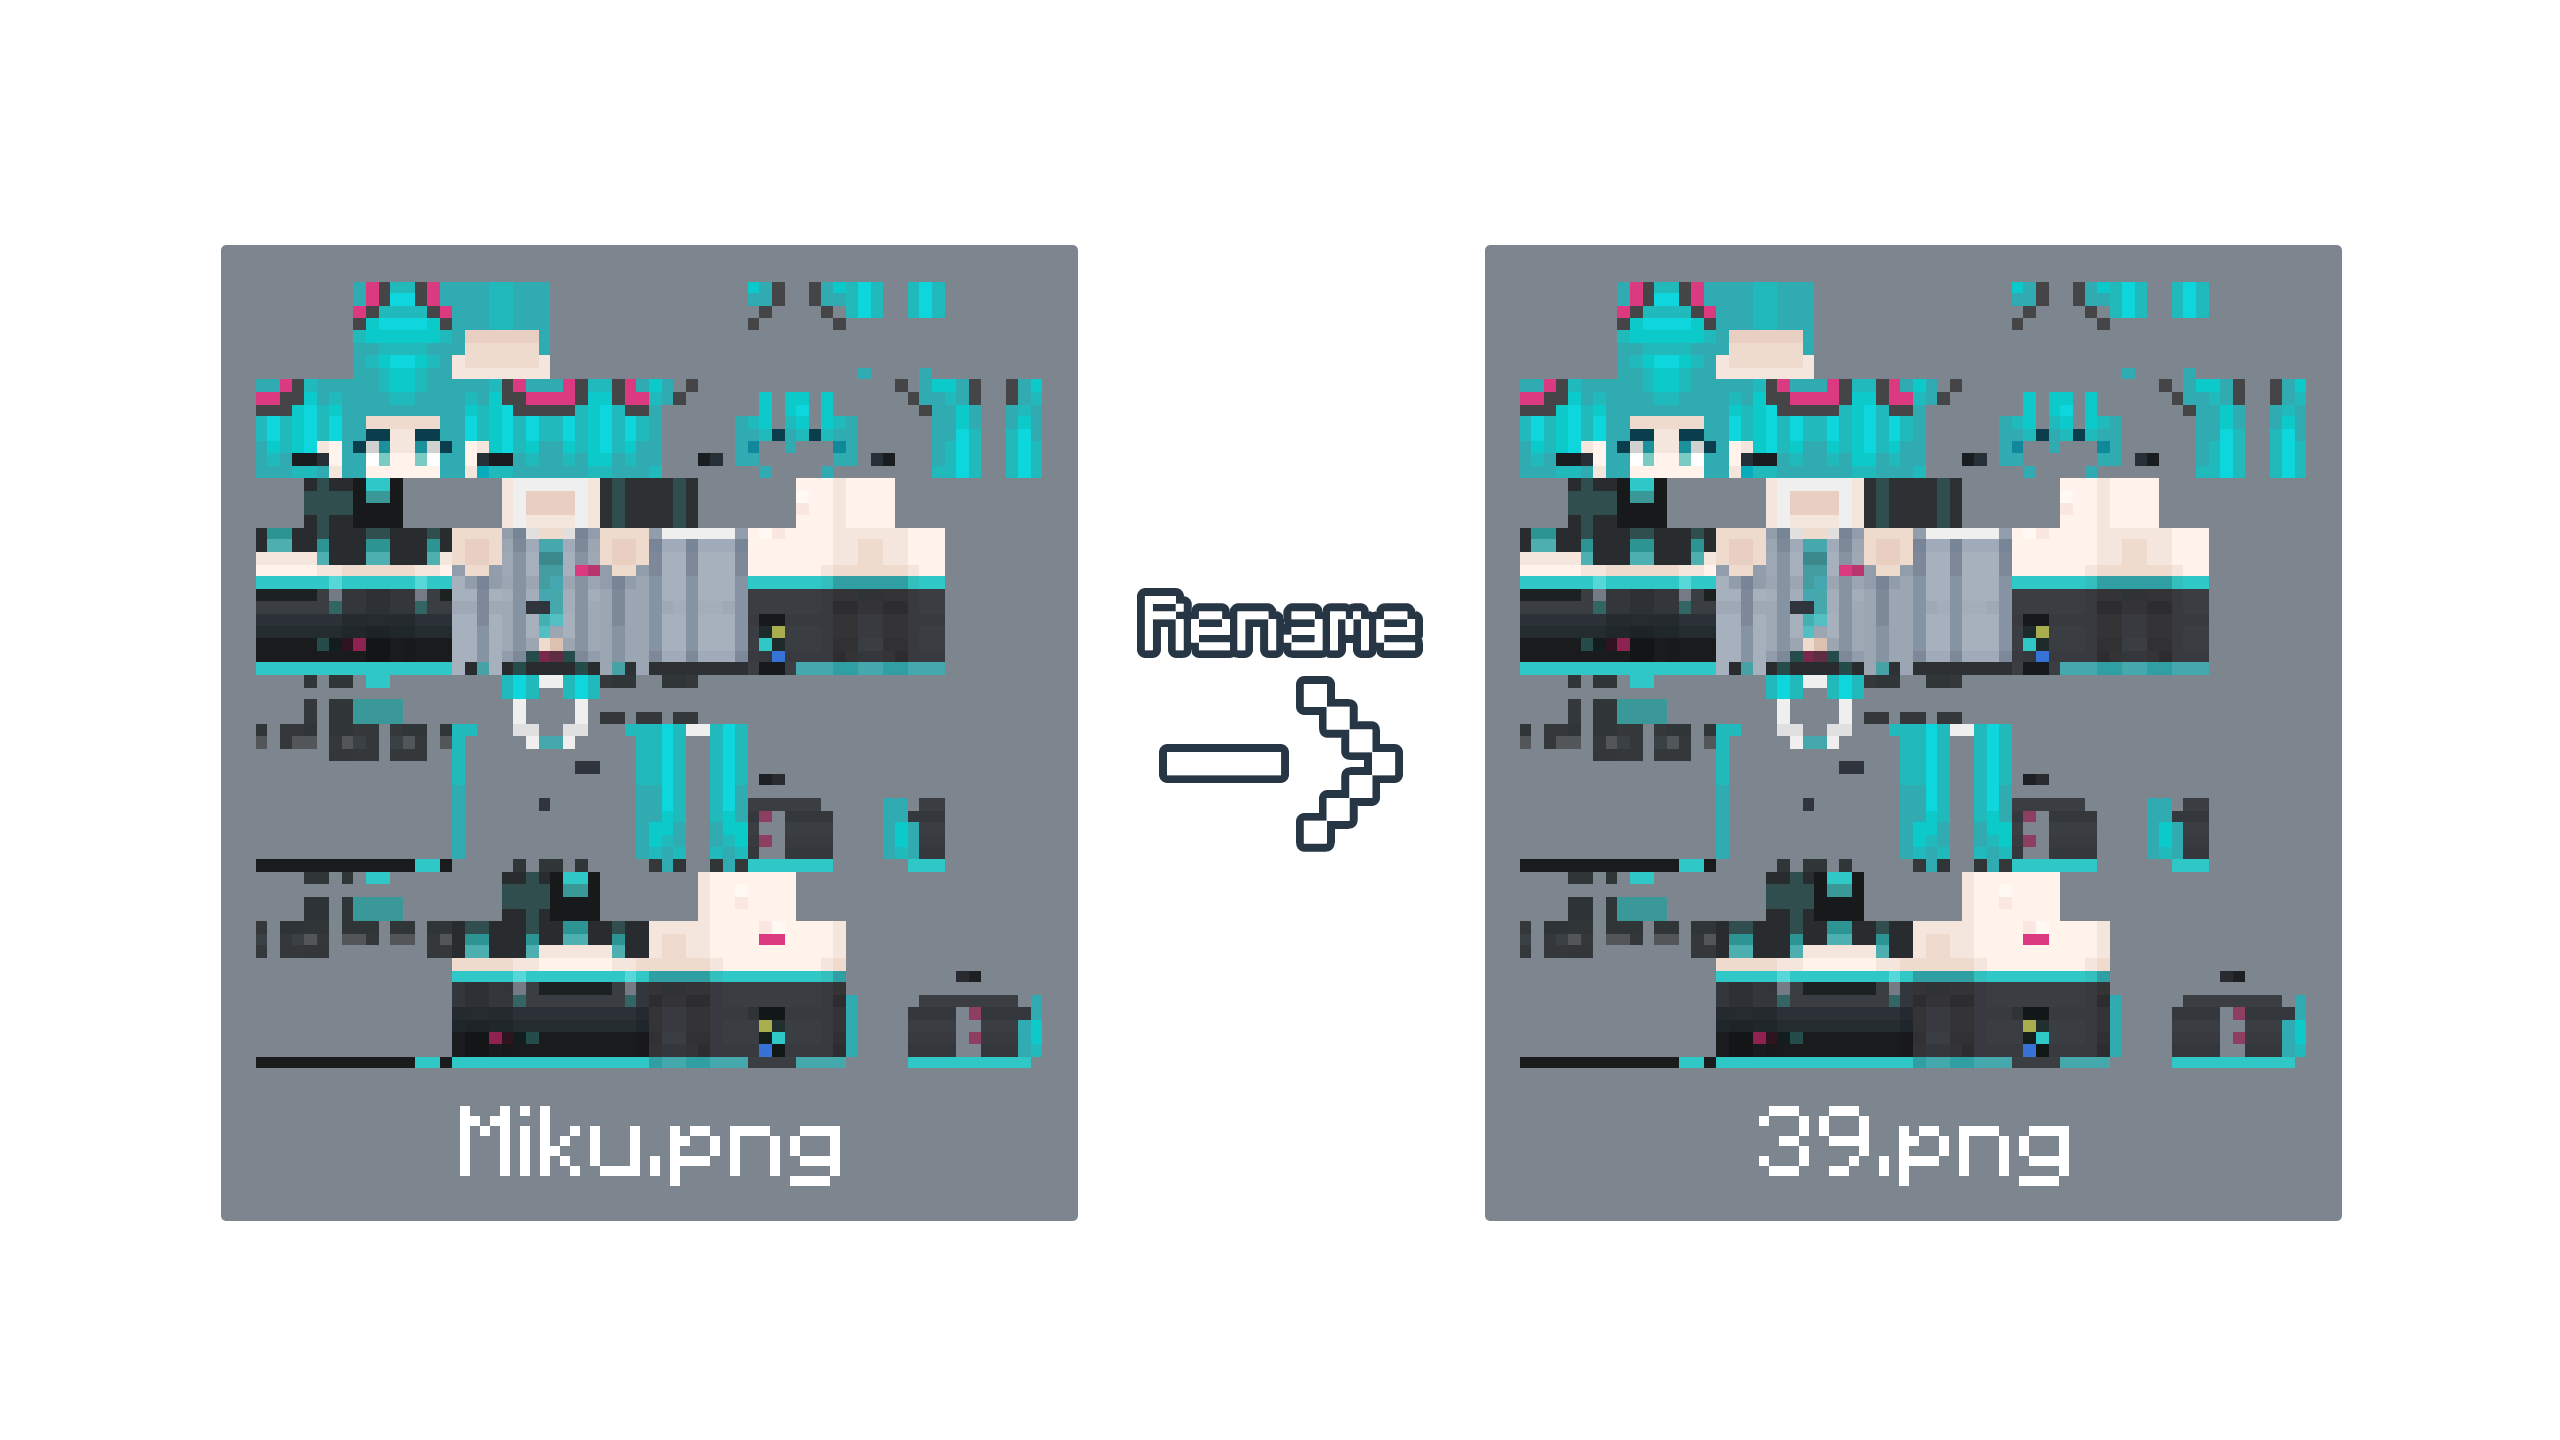
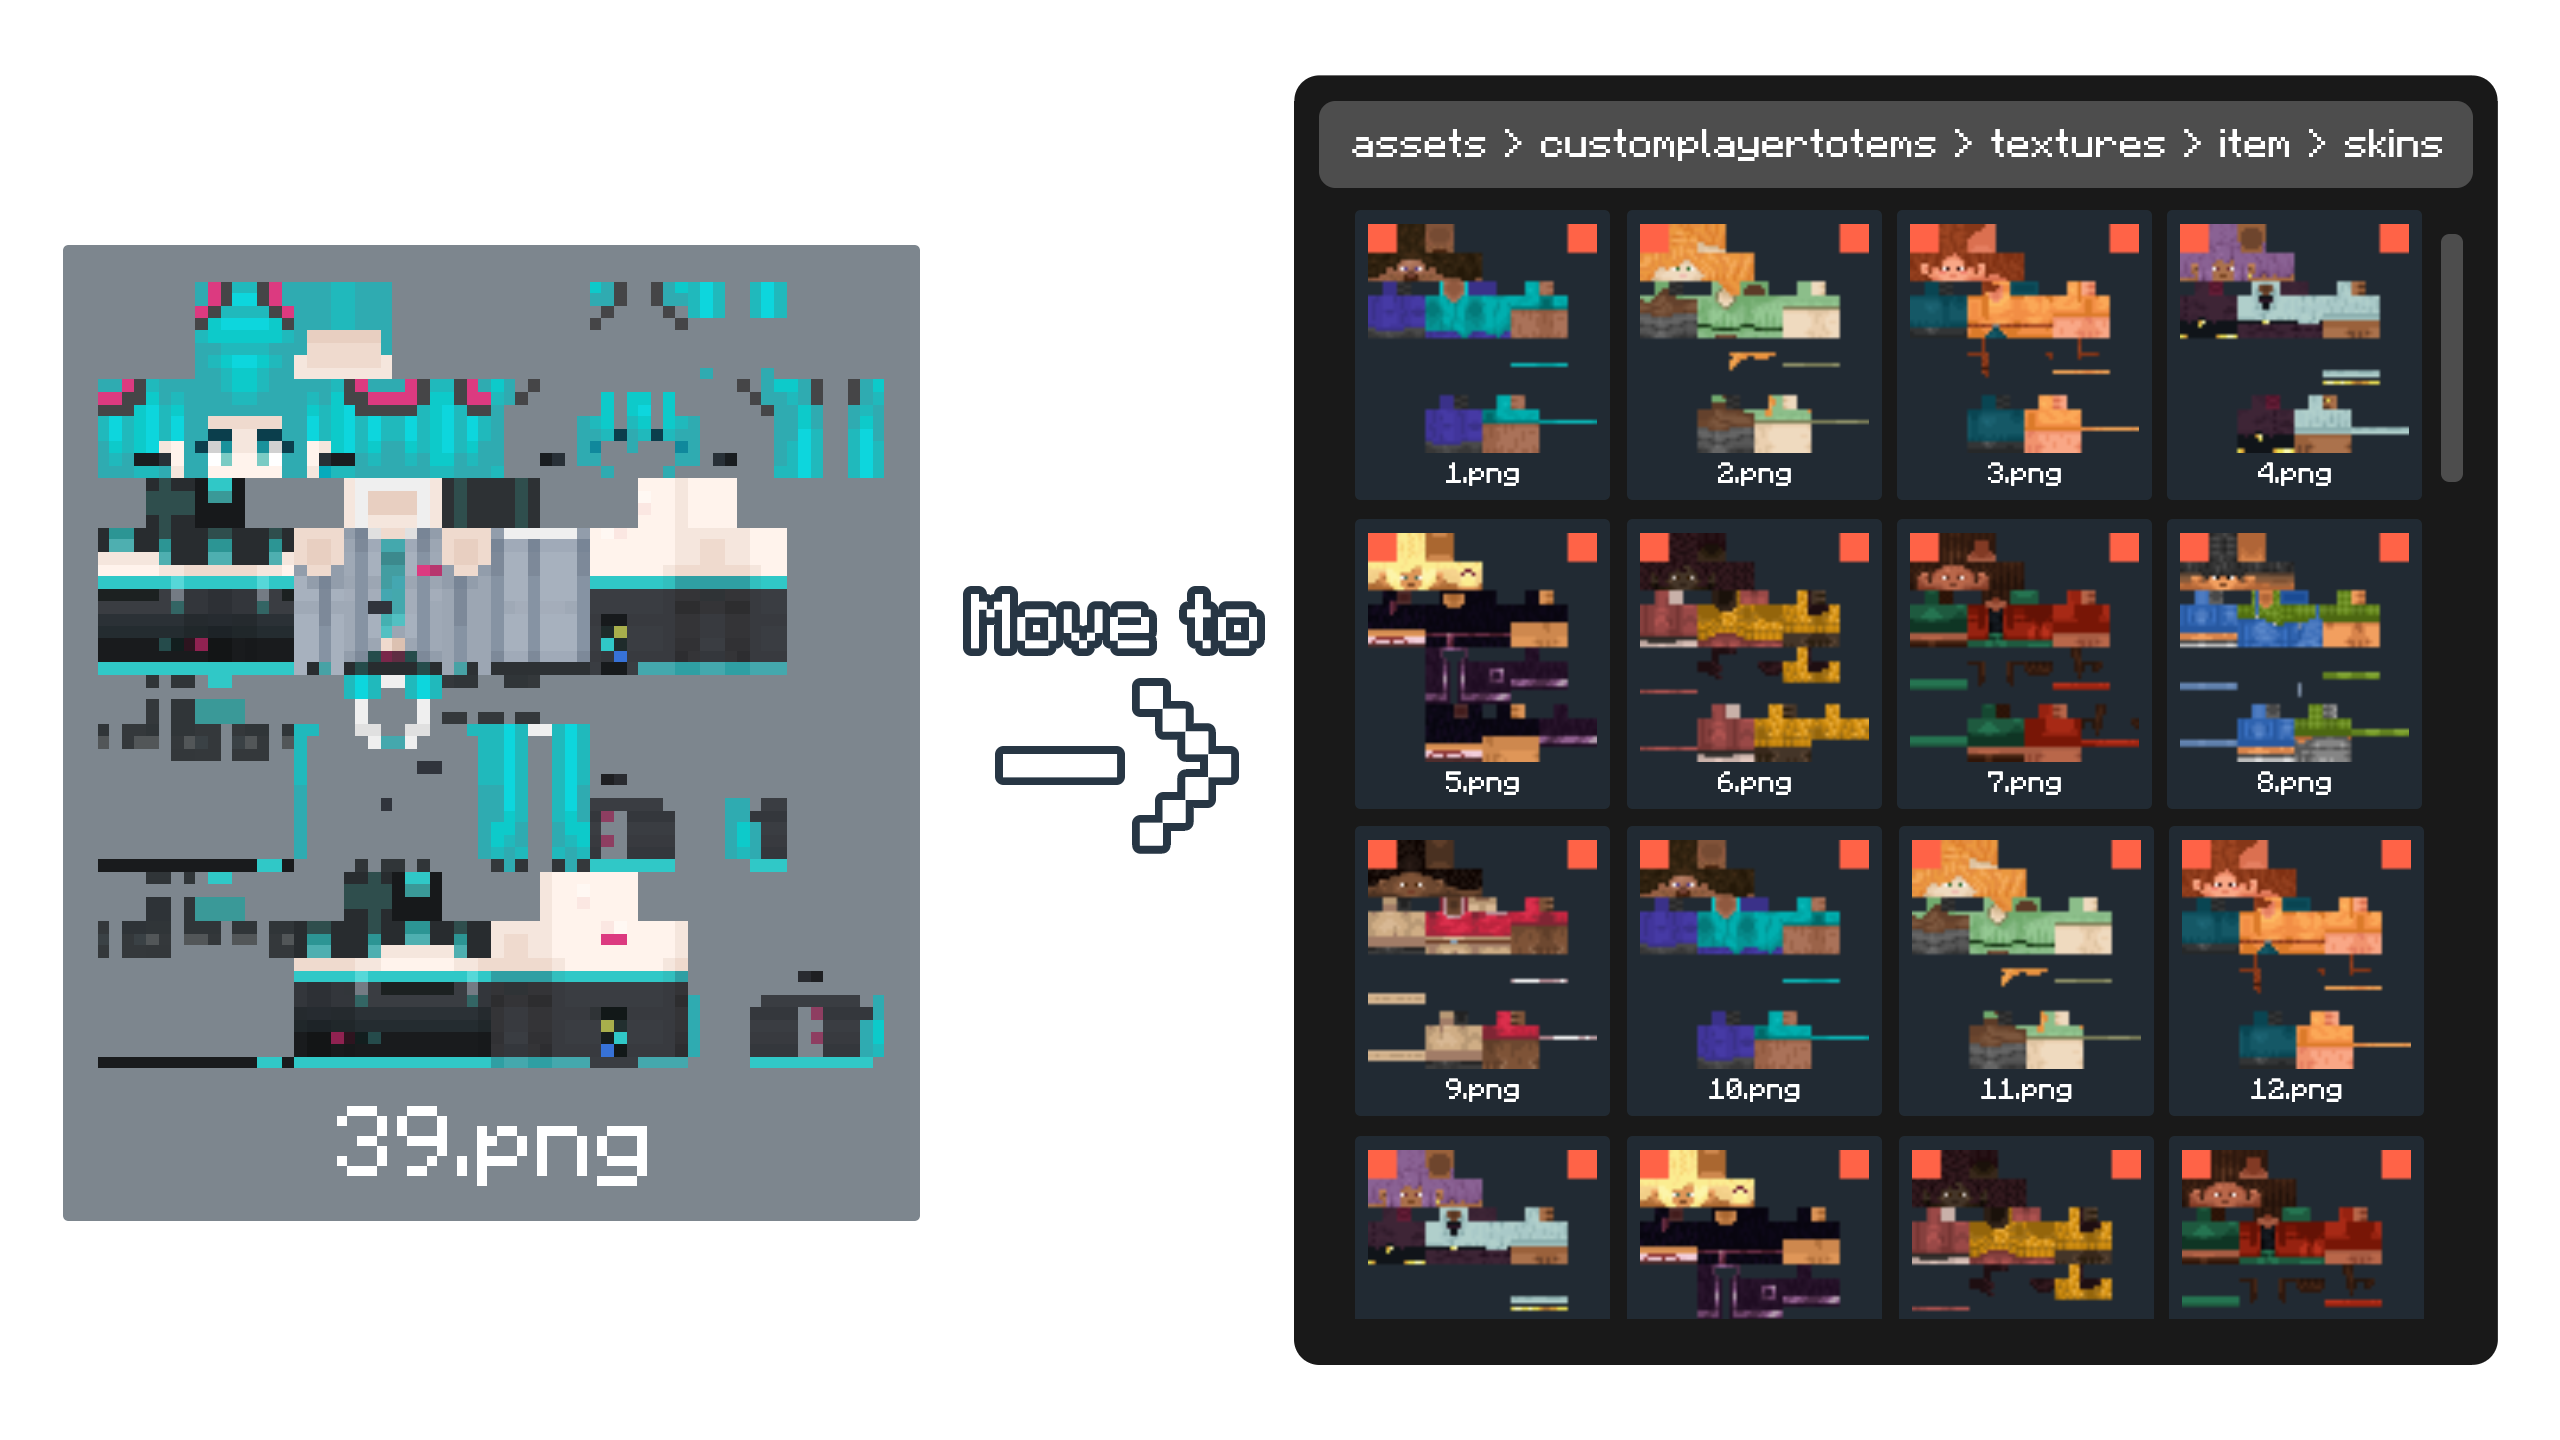
* Go to the Resource Packs Folder by pressing "**Open Resource Pack Folder**" in the Minecraft resource pack settings.
* Find the ``` Custom Player Totems [x.x].zip ``` and open the file.
* Go to this Location ``` \assets\customplayertotems\textures\item\skins ``` and copy and paste your custom skin image file _(renamed to the slot number)_ to the ``` skins ``` folder; it will prompt or automatically replace the default image file with your customized skin image. Alternatively, you can delete the default skin image file and then place your customized skin image.
* After Customizing, enable the resource pack.
* Sample Image Below on how to get your customized player totem ingame.
HOW TO HIDE OR REMOVE THE SMALL TOTEM ICON
* Disable the resource pack.
* Go to the Resource Packs Folder by pressing "**Open Resource Pack Folder**" in the Minecraft resource pack settings.
* Find the ``` Custom Player Totems [x.x].zip ``` and open the file.
* Go to this Location ``` \assets\minecraft\models\lapietous ```.
* Find the ``` totem_icon.json ``` and rename it whatever you want, or just rename it to ``` no_totem_icon.json ``` or delete the file if you want to remove it permanently.
* Find the ``` totem_icon_invisible.json ``` and rename it to ``` totem_icon.json ```.
* Enable the resource pack, and the mini totem icon should be gone.
HOW TO TRANSFER CUSTOMIZED SKINS TO A NEW VERSION
* Disable the OLD and NEW resource packs.
* Go to the Resource Packs Folder by pressing "**Open Resource Pack Folder**" in the Minecraft resource pack settings.
* Find the Old Pack (``` Custom Player Totems [old].zip ```) with your custom Skins and find the New Fresh Version Pack (``` Custom Player Totems [new].zip ```) and Open Both files.
* On the Old Pack (with customs skins), Go to this Location ``` \assets\customplayertotems\textures\item ``` and copy the ``` skins ``` folder.
* On the New Pack, Go to this Location ``` \assets\customplayertotems\textures\item ``` and paste the ``` skins ``` folder that you copied, it will prompt or automaticaly replace with your custom player skins.
* Enable the NEW resource pack.
***
# **Additional Info:**
* This pack has not been tested on mods like Punchy!.
* I will add more models and features in future updates.
***
# **You can also see the Resource Pack on:**